Oil Wash Over Pencil: Essential Prep Checklist
Every illustrator treats the pencil stage like a warm-up sketch before the “real work” of oil begins. We get it — there is a certain romance around the moment paint hits panel.
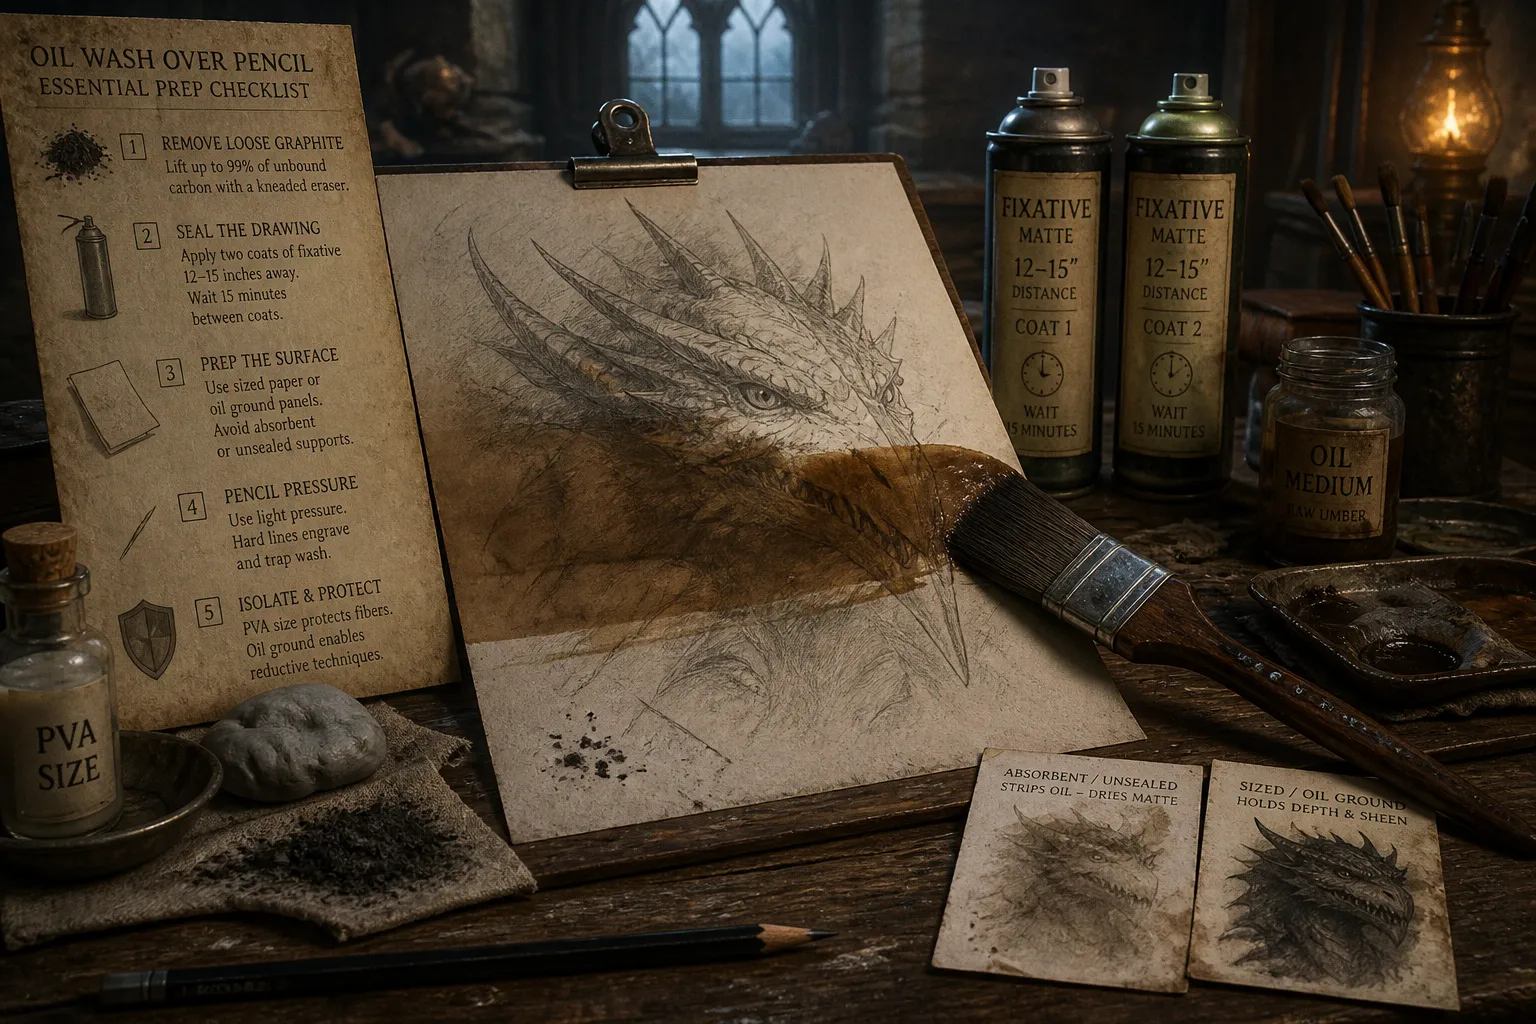
The Graphite Problem Nobody Wants to Admit
The drawing has done its job, the composition is settled, and the brush finally gets to take over.
But loose graphite sitting on a primed surface is not a foundation. It is a contaminant, and a wet brush will find it immediately.
Transparent oil layers do not hide graphite contamination. They preserve and redistribute it. A soft grey that seemed to disappear into the first wash can remain as a haze across passages meant to stay clean. Over time, the effect may become more obvious as the surrounding values settle, the paint film changes in appearance, or the work is viewed under different light. A strong composition can be compromised at the underpainting stage simply because the pencil was treated as harmless dust.
It is not harmless. Pencil prep is not housekeeping. It is load-bearing.
The point of preparation is not to erase the drawing or sterilize the surface until it loses character. It is to control what remains on the support, how firmly it is attached, and how the first oil layer will interact with it.
What Loose Graphite Actually Does Under Oil
Graphite particles are not bonded to the ground in the way pigment is bound inside a dried paint film. They are resting on the surface — closer to coal dust than to ink. Some of the marks may have been pressed into the tooth of the gesso, but a large amount of the material can still be sitting loosely between those ridges.
The moment a solvent-loaded brush passes across the surface, those particles migrate into the wet medium. From there they can be carried across the drawing, trapped in surface texture, or redistributed into areas that were originally untouched.
The contamination usually appears in a few recognizable patterns:
- Tonal fog. Light passages planned as clean white or pale colour read as flat grey because unbound carbon has been dragged into them.
- Smear lines. Brushstrokes leave graphite trails behind them, even when the brush looks clean and the wash is thin.
- Darkened texture. Graphite caught in the tooth of the ground becomes more visible when transparent colour settles around it.
- Uneven transitions. A value passage that should move gradually from light to dark develops dirty edges where the brush picked up material from the drawing.
- Persistent contamination. The first wash may appear acceptable when wet, yet the grey remains embedded in the underpainting and becomes difficult to separate from the paint film once dry.
The last problem is the one that causes the most confusion. A painter may look at the work later and assume the value structure has shifted because of glazing, varnish, or changing light. Sometimes that is true. But if the graphite was never secured, the preparation itself may be responsible for the dirty light passages and unstable-looking transitions.
Adding more layers will not solve the source problem. Covering contaminated lights with opaque paint may hide the symptom, but it also changes the surface design and can flatten the intended transparency. The reliable fix is earlier and less dramatic: remove loose material before wet medium touches the panel, then secure what remains.
Securing the Drawing: Three Lines of Defense
There are three useful stages of control: mechanical removal, fixation, and, where the support demands it, an isolation layer. They do different jobs. A fixative is not a substitute for cleaning, and an isolation coat is not a substitute for either one.
1. The Kneaded Eraser Pass
Roll a clean kneaded eraser lightly across the entire drawing. Not hard — lightly. You are lifting unbound graphite, not erasing the drawing itself.
A kneaded eraser works best when it is pressed and lifted or rolled over the surface rather than scrubbed back and forth. Scrubbing can drive graphite deeper into the tooth, spread it into the light areas, and polish the surface unevenly. The motion should feel closer to picking up dust than to correcting a line.
Tear off or fold over a fresh section of eraser for each session. A tired eraser is already loaded with the carbon you are trying to remove. Work in overlapping passes, kneading the eraser frequently to expose clean material. In open areas, use a broader section; around carefully drawn edges, reduce the pressure and keep the motion controlled.
The goal is not to make the drawing pale at any cost. It is to remove the graphite that is merely sitting on top of the ground while leaving enough structure for the wash to follow. If a line disappears under the first gentle eraser pass, it was probably not firmly attached in the first place.
Avoid dragging an eraser sideways across a dark passage and into a light one. That is how contamination gets redistributed instead of removed. Lift straight up where possible, and inspect the surface under raking light if the drawing is dense or heavily worked.
Skipping this step forces the fixative to do a job it was never meant to do. It has to immobilize a larger amount of loose carbon, which increases the chance of a dirty surface, a heavier film, or a later interaction between graphite and solvent. The cleaner the drawing is before sealing, the less there is to trap.
2. Spray Fixative
After the eraser pass, what remains should be structurally part of the drawing: light enough that it does not smear under brief contact, but still vulnerable to prolonged solvent exposure. That is what the fixative is there to control.
Use a drawing fixative intended for artwork rather than treating a general-purpose aerosol as an archival material by default. Apply it in light, even passes. The can should remain in motion, and the spray should reach the support as a mist rather than a wet stream.
Two light coats are a common working approach, with sufficient drying time between them for the surface to lose its wet appearance. The exact number of passes and drying interval depend on the product, the support, the humidity, and how heavily the drawing has been worked. The manufacturer’s directions matter more than a universal recipe.
Spray distance matters because both extremes create trouble. Too close, and the fixative can puddle, shift graphite, create a glossy or waxy patch, or produce a film that resists the next layer. Too far, and the material may arrive as a dry dust that gives uneven coverage without adequately holding the drawing.
Work with ventilation and protect the surrounding area. Spray fixative is not a harmless studio mist, and an open window alone may not be enough in a small room. Keep the finished surface flat while it dries unless the product instructions indicate otherwise, and do not rush directly from spraying into solvent work.
Graphite does not survive on hope. It survives on sealed surfaces, locked particles, and a hard barrier between drawing and brush.
This is not an argument for hairspray as an archival substitute. Hairspray can contain resins, plasticizers, fragrance, and other ingredients that were not selected for permanent layering under oil. It can yellow, remain tacky, or create a surface whose behaviour changes as the work ages. A proper drawing fixative is not automatically perfect for every mixed-media combination, but it is at least made for the relevant task.
3. Isolation Coats
If you are working on a paper-mounted board, a highly absorbent ground, or a support where fixative penetration is uncertain, an isolation coat can provide another level of separation between the drawing and the oil wash.
This is a backstop, not a replacement for cleaning and fixation. It is especially useful when the surface is fragile, the paper is thin, or the next solvent layer needs a more predictable barrier. A clear acrylic medium may be appropriate in some systems, but the product must be compatible with the fixative, the ground, and the later oil layers.
Apply it only after the fixative has dried thoroughly. Brush it out thinly and evenly, avoiding repeated scrubbing over the drawing. A heavy acrylic layer can soften the appearance of the pencil, alter the tooth, or create a slick surface that makes the first wash difficult to control.
Compatibility varies by brand and by surface. Commercial clear gessoes, acrylic mediums, fixatives, and oil grounds do not all form a reliable stack when placed together. Test the entire sequence on a scrap panel made with the same support, ground, pencil, fixative, and isolation product. The test is not busywork. It is the only way to find out whether the surface will bead, resist, remain tacky, cloud, or accept the wash as intended.
Surface Prep: Size, Gesso, and the Absorbent Trap
The pencil stage only works if the support underneath it was prepared properly in the first place. Many failures that appear to be drawing problems are actually support problems revealed by the wash.
Oil paint needs its binder to remain in the paint film. If the support absorbs that binder too aggressively, the wash can lose depth, dry unusually matte, and sit in a weak or uneven layer. A thin transparent passage may look dull not because the pigment is wrong, but because the surface has taken too much from the medium.
Porous Paper and Canvas
Raw paper and unsealed canvas are absorbent. They pull oil and solvent into the fibers, often unevenly. The result can be a wash that looks chalky, sinks in, or loses the slight surface movement that makes transparent oil passages useful.
Paper intended for oil painting may already have a barrier, but ordinary drawing paper should not be assumed to be ready for oil. A size or suitable sealing layer helps isolate the fibers before the ground and paint are applied. Fabric supports likewise need preparation appropriate to oil painting rather than being treated as interchangeable with pre-primed canvas.
Thin, even coats are preferable to one heavy coat. Let each layer dry fully before applying the next. A rushed size layer can remain uneven or create weak spots that only become obvious once solvent and oil reach the surface.
Paper also moves more readily than a rigid panel. Changes in moisture, handling, and mounting can affect the relationship between the drawing, ground, and paint film. If the finished work depends on precise pencil marks beneath a transparent wash, mounting the paper securely before drawing is part of the preparation, not an afterthought.
Rigid Panels
Hardboard, MDF, plywood, and prepared painting panels require their own sealing and grounding decisions. A rigid support can be excellent for an oil wash because it allows controlled wiping, scraping, and dry-brush lifting without the bounce of fabric.
The panel still needs a properly sealed surface and a ground suitable for oil painting. Depending on the system, the sealer may be acrylic, shellac, or another compatible barrier, with the ground applied above it. The important point is that the layers must be designed as a system rather than assembled from whatever happens to be available.
Panels are particularly useful when the wash plan involves subtraction:
- wiping back into a wet passage with a clean rag;
- pulling a light with a dry brush;
- softening an edge without disturbing the support;
- removing paint from a small area with a controlled tool;
- keeping a broad value field stable while editing selected marks.
These actions can be performed on fabric, but the response is less predictable. If the underpainting depends on repeated reductive work, a rigid panel gives you a more dependable surface.
Gesso and Tooth
Gesso has two practical jobs in this setup. It provides a consistent ground for value planning, and it creates a degree of tooth that can hold the pencil without allowing every mark to disappear into the surface.
Too little tooth and the graphite becomes slick, easily displaced, and difficult to control. Too much tooth and the pencil catches in the ridges, creating dark deposits that are hard to erase and easy for a wash to collect. The best surface is not necessarily the roughest one. It is the one that gives enough control for the drawing without turning every line into a reservoir.
A clear or translucent ground over a toned support can work when you want the underlying value to participate in the wash. But preserving a tone beneath transparent paint also means accepting that every contaminant and uneven patch may remain visible. A white ground gives more room for clean lights; a toned ground can unify the image but leaves less tolerance for muddy preparation.
The Pressure Problem: When Your Pencil Becomes a Router
Here is the failure mode nobody warns beginners about clearly enough.
Press hard with a graphite pencil and you do not just make a darker mark — you alter the surface. The point can compress the gesso, polish it, or cut shallow channels into the ground. Graphite then sits inside those channels, where an eraser cannot easily reach it and a transparent wash can collect around it.
The result is a set of dark lines that refuse to disappear. They may remain visible through the wash, become darker at the edges, or reappear after you soften the surrounding paint. No amount of sealing can restore a surface that has already been physically engraved.
This is not a fixative problem. It is a pressure problem, and it has to be managed while drawing.
Hard pressure does not make a stronger drawing. It makes a deeper groove for the wash to get trapped in.
The solution is not simply to choose the softest pencil available. Very soft graphite can produce rich marks with less pressure, but it can also leave more loose material on the surface and smear more easily. The useful combination is a pencil that gives the required value without forcing the point into the ground, followed by a careful cleaning and sealing process.
Two approaches are reliable:
- Reduce pressure. Build darker passages through repeated light strokes instead of one deeply pressed line. Rotate or sharpen the pencil when the point begins to drag, and keep the side of the lead available for broad value shapes.
- Use hardness strategically. Harder pencils can be useful for construction and delicate edges, while softer pencils can establish darker structural accents. Neither category is automatically safe; pressure and surface response matter more than the label alone.
- Keep the drawing economical. Every extra graphite layer is another amount of loose material to remove or secure. If a value can be carried by the oil wash, do not bury it under unnecessary pencil.
- Design around existing grooves. If the finished drawing has already been pressed into the ground, those lines are part of the surface now. Let them function as accent marks, or adjust the wash so they read as deliberate structure. Pretending they will vanish is not a preparation strategy.
The belief that hard graphite lines disappear beneath transparent oil washes is persistent because the wet paint can temporarily disguise them. Once the wash settles, the channels often become clear again. Adjust the pressure before the surface is damaged, not after.
Building the Wash: Solvent, Binder, and Wet-into-Wet
Once the drawing is clean and secured, the wash can do its actual job: establish a value structure that remains open to revision while giving the final painting a coherent base.
A solvent-only wash over a properly prepared surface behaves as a thin value stain. It carries pigment with little body, sets relatively quickly, and allows the drawing or ground to remain active beneath it. This can be useful when the goal is a lean underpainting with visible construction and clear value decisions.
The danger is assuming that “thin” means “safe” on every support. A solvent-rich mixture still needs a surface that will not absorb it unpredictably. If the support is too porous, the wash may disappear into the ground instead of remaining as a controllable film.
Add a small amount of oil medium and the paint gains body and open time. It can be manipulated, blended, wiped, and pulled with more control. The precise ratio should not be treated as a law: pigment load, solvent type, medium, brush, and surface all change the result. A mixture that behaves well on a sealed panel may become weak and matte on absorbent paper.
Wet-into-wet work is where preparation becomes visible as technique. You can place a warm dark over a cooler field, lift a light with a dry brush, soften a transition with a nearly clean brush, or wipe a shape back until the ground participates again. Each action depends on the underlying graphite staying where you left it.
That is why reductive underpainting is unforgiving of poor sealing. If the drawing is loose, every wipe can turn a value edit into a graphite smear. If the support is absorbent, every wipe can expose a dull patch. If the surface is too slick from an overly heavy fixative or isolation coat, the wash may bead and refuse to distribute evenly.
The basic logic remains simple:
1. Prepare a surface that will accept the wash without stripping the binder.
2. Remove loose graphite before sealing.
3. Fix the remaining drawing with a light, even application.
4. Add an isolation layer only when the support and material stack justify it.
5. Test the mixture and handling on the same kind of surface before committing the finished image.
What you cannot do is layer a solvent-heavy wash over an unsealed absorbent support and expect the result to hold together. The support will take what it can from the mixture, the paint will dry unevenly, and the wash will tell you nothing useful about the composition.
Prep Checklist for Oil Wash Over Pencil
Before the brush touches solvent, run through the sequence. The order matters because each stage affects the next one.
| Stage | Action | What You’re Solving |
|---|---|---|
| Support | Size or seal porous paper and canvas; prepare rigid panels with a compatible ground | Binder stripping, uneven absorbency, matte drying |
| Ground | Use a surface with enough tooth to hold graphite without excessive abrasion | Graphite loss, deep deposits, uncontrolled smearing |
| Drawing | Keep pressure light and avoid cutting grooves into the ground | Engraved lines that remain visible through the wash |
| Carbon | Make a fresh kneaded-eraser pass; lift rather than drag | Loose graphite contamination |
| Fixative | Apply a suitable drawing fixative in light, even coats | Particle migration under solvent |
| Isolation | Add a compatible acrylic barrier only when the support or material stack calls for it | High absorbency or uncertain fixation |
| Cure and dry | Allow every layer to dry according to the product instructions | Soft films, tackiness, clouding, and adhesion problems |
| Test | Repeat the full sequence on a scrap panel with the same materials | Brand-specific failures before they reach the painting |
| Wash | Start with a controlled, lean mixture and observe how the surface accepts it | Overworking, sinking-in, beading, and loss of transparency |
If any row is unchecked, you are guessing at the wash stage. The point is not to create a ritual for its own sake. It is to make the surface predictable enough that a compositional decision is not confused with a materials failure.
A Small Test Panel Is Part of the Drawing
A scrap test should not be an afterthought reserved for unfamiliar brands. It is particularly useful when several layers are involved: prepared panel, ground, graphite, eraser, fixative, isolation medium, solvent, and oil colour.
Make the test resemble the finished setup. Use the same ground, the same pencil pressure, and the same cleaning method. Draw both a light passage and a dark passage. Add a few lines with deliberately different pressure so you can see whether the surface is holding graphite or trapping it. Apply the fixative and isolation layer as you plan to use them, then introduce the wash.
Look for practical responses rather than waiting for a dramatic failure:
- Does the wash spread evenly or break into beads?
- Does a clean brush pick up grey when it crosses a light passage?
- Does wiping lift the paint cleanly, or does it smear the drawing?
- Does the surface become glossy in isolated patches?
- Do the light areas remain light after the wash dries?
- Does the brush drag because the surface is too absorbent or too resistant?
- Can you soften an edge without disturbing the pencil underneath?
A test cannot predict every change that may occur in a finished painting, but it can expose an incompatible material stack before it costs you the drawing. It also gives you a better sense of how much pressure to use, how wet the brush should be, and how quickly the surface responds.
Common Failure Modes and What They Actually Mean
A short field guide helps when the surface has already begun to misbehave.
- Greys that will not lift to white. This usually points to graphite contamination or graphite caught in the texture of the ground. Do not keep scrubbing the wet paint and hope the grey will separate. Stop, identify whether the problem is in the drawing or the wash, and correct the preparation on the next attempt.
- Matte passages under transparent oil. The support may have stripped binder from the mixture. The surface was too absorbent, the wash was too lean for the ground, or both. Correct the sealing system rather than compensating with random extra medium.
- Dark lines that survived the wash. Look for pressure engraving. If the line is sitting in a groove, more fixative will not remove it. Either incorporate it into the design or avoid cutting the surface in the next drawing.
- Waxy resistance under the wash. Fixative may have been applied too heavily, too close, or over a surface that was not ready to receive it. An overly slick isolation coat can create the same problem.
- The wash beads or pulls away. The surface may be too smooth, contaminated, or incompatible with the medium. It can also indicate an uneven acrylic layer or residual aerosol material.
- The drawing disappears before the wash is placed. The ground may not have enough tooth, the graphite may be too light for the chosen process, or the eraser pass may have been too aggressive. Increasing pressure is not the only answer; consider a more suitable surface or a more controlled drawing sequence.
- Edges become dirty while wiping. Loose graphite has probably migrated, or the cloth is carrying pigment and carbon from one area into another. Use clean sections of cloth and change the working direction before the contamination spreads.
- Lights look acceptable wet but dull after drying. This can be the result of sinking-in, uneven absorbency, or a contaminated transparent layer. Compare the affected areas with the test panel rather than assuming the pigment itself is at fault.
- A surface changes character after additional layers. The problem may be cumulative incompatibility between the fixative, isolation coat, and oil medium. Record the material sequence used on the test panel so you can identify which layer is responsible.
The useful habit is to diagnose the failure at the layer where it began. A grey light is not automatically a colour-mixing problem. A resistant surface is not automatically a brush problem. The more precisely you identify the cause, the less likely you are to bury it under another layer.
Closing Position
Pencil prep is one of the most skipped stages in oil underpainting, and it is the stage that determines whether the wash behaves or fights you. Wet-into-wet handling, reductive wiping, transparent glazing, and later colour decisions all depend on the support and the drawing underneath being stable, sealed, and free of loose carbon.
There is no shortcut hidden in a particular pencil brand. There is no paint that can repair a support that was never sealed or a ground that has already been engraved. The useful tools are ordinary: a suitable surface, a kneaded eraser, a proper fixative, a compatible isolation layer when needed, and a test panel that tells you how the whole stack behaves together.
Use them in the right order. Remove what is loose. Secure what remains. Protect the surface only as much as the material system requires. Then let the oil wash establish the value structure instead of asking it to conceal a preparation mistake.
Done properly, the wash stops being a gamble. It becomes what it should have been from the start: the foundation.