Oil Wash Over Pencil: Materials and Setup Checklist
Most oil washes over pencil drawings fail before the brush touches paint. Not because the artist chose the wrong umber, or because the solvent was too lean, or because the fantasy castle lacked enough skulls.
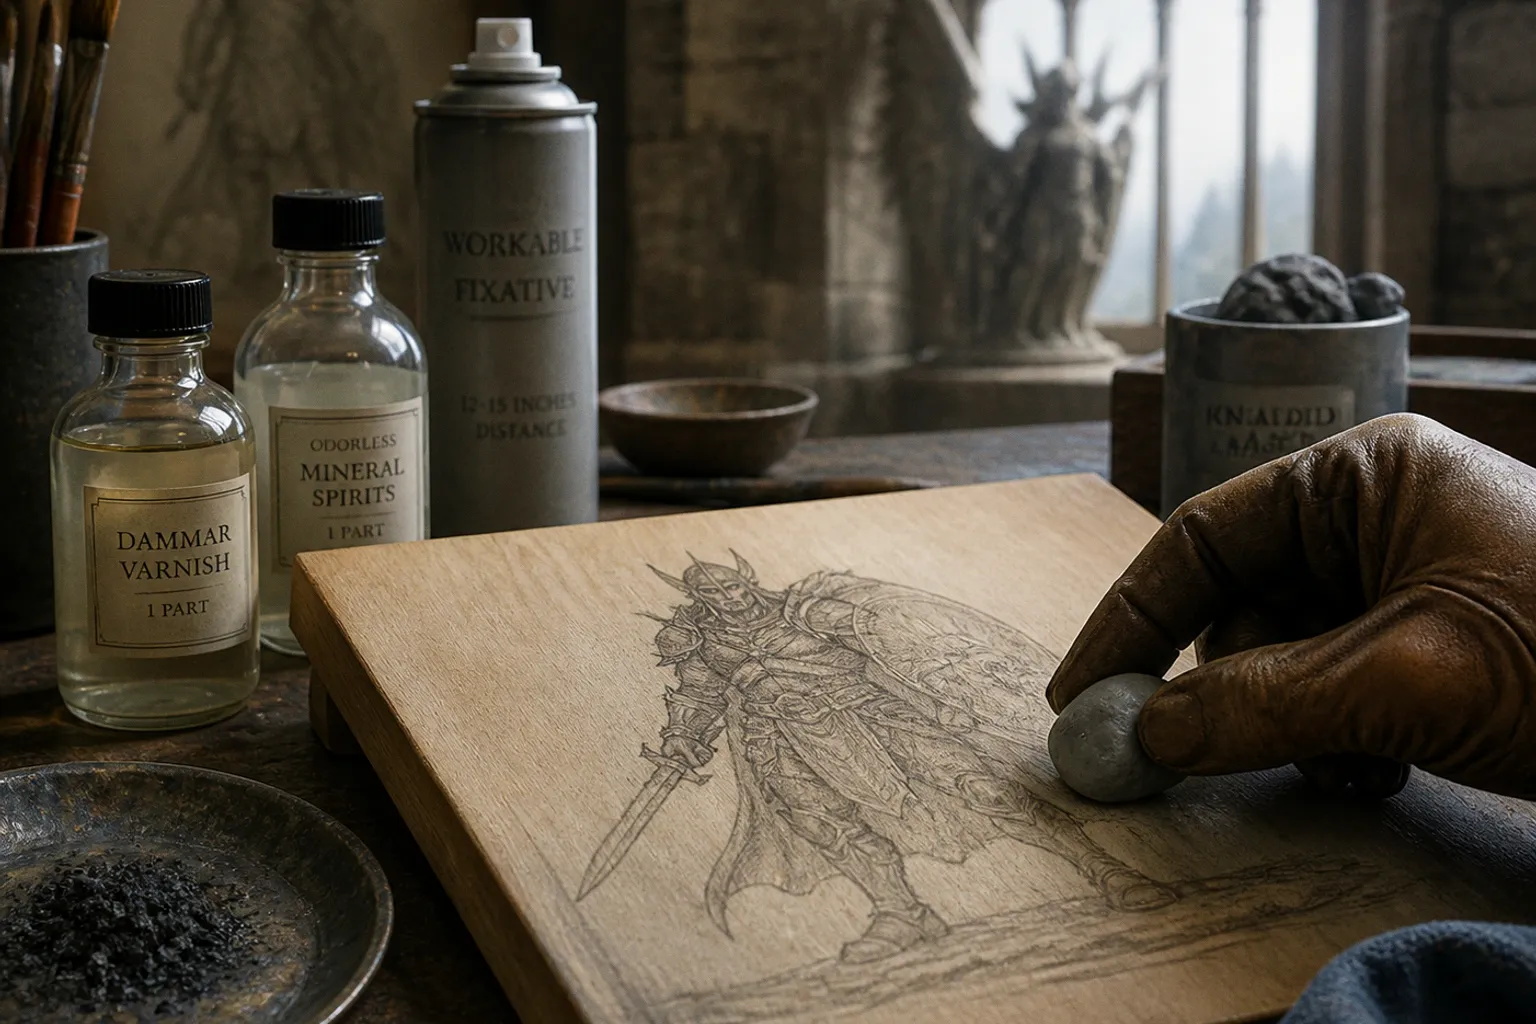
The failure is quieter: loose graphite gets dragged into the first wash, turns pale passages dirty, and may gradually migrate through oil layers as a dull grey haze.
Graphite is crystalline carbon. Oil does not neatly lock it down. Leave a soft, heavily worked pencil drawing exposed beneath translucent paint, and you have built a slow contamination system into the image. It may not announce itself in the first week. It has time. Five to ten years is plenty for that upward drift to become visible in vulnerable light areas.
Oil wash over pencil drawing preparation is therefore not a ceremonial “prep stage.” It is the first control point in the painting’s visual hierarchy. If the drawing is meant to steer the composition, preserve its framing and focal point. If it is only scaffolding, remove as much of it as possible before it starts freelancing inside your shadows.
The real problem: graphite is not an underpainting
A graphite drawing can look impeccably controlled on a white panel. Then the first transparent wash hits it, and suddenly every erased construction line returns from the dead. The broad cheek plane goes grey. A yellowed moon becomes a nicotine stain. The white edge on an astronaut’s helmet acquires that familiar “I rubbed it with a thumb” finish.
This happens for two distinct reasons:
- Loose surface graphite smears immediately. A wet brush, a rag, a solvent-rich wash, even an acrylic medium can pull it into the surrounding area.
- Embedded graphite can migrate over time. Carbon particles are not encapsulated by oil binder in the way many painters casually assume. In layered passages, especially pale or transparent ones, the result can be a grey veil rising through the paint film.
- Pencil pressure creates a second trap. Hard grooves in a primed surface catch wash differently. The line may stay darker than intended even after you have sealed it, because the panel itself has become a tiny engraved channel.
- A detailed drawing tempts overreliance. This is the compositional mistake. A painter keeps preserving every contour, then paints timidly around the drawing. The oil wash becomes colouring-in with expensive materials.
A pencil drawing under an oil wash is a map, not a sacred relic. Seal what must survive; erase what is merely evidence of indecision.
For traditional fantasy art underpainting, this matters more than usual. We often build scenes from broad dark masses, controlled atmospheric recession, sharp silhouette breaks, and a few high-value accents. Graphite contamination muddies exactly the passages that need to stay clean: fog, skin, distant architecture, moonlight, polished armour, spectral effects. In other words, all the glamorous bits. Naturally.
Build the surface before drawing, not after the damage
The cleanest solution is boringly practical: start with a surface that accepts pencil lightly, erases well, and has enough tooth for a thin oil layer without behaving like sandpaper.
A rigid panel is generally easier to control than stretched canvas for an oil wash on pencil sketch. It lets you draw with a light hand, erase without flexing the support, and apply a barrier evenly. A well-primed canvas can work, but its weave may turn fine construction into broken, skipping lines—useful for a rough study, less useful when the drawing carries architectural perspective or a figure’s face.
For a panel workflow, the setup is straightforward:
1. Prepare the ground and let it cure fully. Whether the panel has an acrylic ground or an oil-primed surface, do not draw into a half-dry layer just because the deadline is staring at you. The drawing should sit on a stable surface, not plough through a soft one.
2. Level excessive texture if the drawing needs precision. Wet-sanding a prepared panel with around 220-grit paper produces a smoother, more predictable drawing surface. Do not polish it into a mirror. Oil paint still needs a usable tooth; the point is to eliminate random peaks that shred a controlled line.
3. Choose a restrained graphite grade. Harder pencils lay down less loose carbon and make a better technical map. Softer grades give an attractively dark line, then punish the first wash with a soot cloud. Use the soft pencil only where the darkness has a specific job—perhaps a final silhouette correction—not for every casual search line.
4. Keep construction and commitment separate. Block perspective, major figure placement, horizon, and focal forms lightly. Reinforce only the lines that actually govern the narrative read. If a line does not affect framing, overlap, gesture, or the focal point, it probably does not deserve to survive into paint.
5. Do not solve values with graphite. A graphite-filled shadow is not an underpainting. It is a dirty sponge waiting for solvent. Establish value masses with the oil wash, where their edges and temperature can be controlled.
The goal is not a museum-grade pencil illustration hiding beneath paint. The goal is a drawing that carries the image through the first hour of painting without contaminating it or dictating every decision afterward.
The kneaded eraser pass: the cheapest insurance in the studio
Before sealing pencil drawing for oil paint, reduce the loose graphite load. This is not optional housekeeping. It changes how cleanly every subsequent layer behaves.
Use a kneaded eraser and roll it gently over the entire drawing. Do not scrub. Do not knead it into a sharp point and start excavating the paper-like ground as if you are restoring a fresco. Roll, lift, rotate, repeat. A careful pass can remove up to 99% of excess loose graphite while leaving the essential structure visible.
The drawing should look slightly paler afterward. Good. That is not lost information; that is surplus carbon leaving the building.
Pay special attention to:
- broad shaded pencil areas;
- erased-and-redrawn anatomy;
- sky passages and light local colour zones;
- hard contours around faces, hands, and reflective objects;
- the panel edges, where a hand often drags graphite outward without noticing.
If the drawing becomes too faint after lifting, redraw only the necessary lines with a hard pencil and lighter pressure. Rebuilding selected information is faster than trying to rescue a contaminated first wash. Painters routinely choose the latter because it feels more dramatic. It is not more efficient.
The materials checklist for a stable oil wash
The exact barrier method can vary, but the setup should be deliberate. Here is the working kit worth assembling before the drawing is sealed.
| Material | What it does | Where it earns its place | Common failure |
|---|---|---|---|
| Rigid primed panel | Provides a stable drawing and painting support | Detailed fantasy scenes, controlled washes, architectural layouts | Drawing into an inadequately cured or overly slick ground |
| Hard graphite pencil | Establishes light structural lines with less loose carbon | Perspective, gesture, placement, major contour decisions | Pressing hard enough to score the ground |
| Kneaded eraser | Lifts excess graphite without aggressively abrading the surface | Immediately before any fixative or liquid barrier | Rubbing sideways and smearing graphite into the ground |
| Workable spray fixative | Stabilises graphite before a wet layer touches it | First barrier over a pencil underdrawing | Spraying too close and flooding the drawing |
| Clear acrylic gesso | Adds tooth after a properly fixed drawing | When the oil wash needs more grab on an acrylic-ground panel | Brushing it over loose graphite and creating grey slurry |
| Dammar varnish and odourless mineral spirits | Creates a thin solvent-borne sealing layer | Controlled panel workflow with a light drawing | Applying it too heavily or repeatedly |
| Amber-toned shellac | Traditional isolation and fixing option | Tonal underpainting setups, charcoal or graphite studies | Using it indiscriminately where a pale, colour-neutral base is needed |
| Soft sponge makeup wedge | Lays down a thin, even liquid barrier | Dammar-based seal on a panel | Scrubbing the surface with the wedge |
| Clean brushes, rags, and separate solvent containers | Keeps the first wash from importing contamination | Every oil wash setup | Using the same dirty solvent for the opening layer |
The sequence matters more than brand loyalty. A premium product applied over a loose, greasy graphite drawing still produces a premium version of the same mess.
Spray fixative: controlled coverage, not aerosol weather
Spray fixative is the most familiar route because it is quick, light, and compatible with a drawing-led workflow. It can preserve a pencil structure without burying it under an opaque layer. But the can is not magic, and the standard “spray closer for better coverage” instinct is exactly backwards here.
For a graphite underdrawing intended for oil painting, stand roughly 12 to 15 inches from the surface. That is farther than the 8 to 10 inches commonly suggested on product labels for ordinary drawing fixation. The extra distance helps the spray arrive as a fine mist rather than a wet blast that pools, darkens graphite, and creates uneven patches.
Use alternating passes:
1. Hold the panel upright or at a slight angle in a well-ventilated space.
2. Start the spray off the panel edge, then move across in a steady horizontal pass.
3. Continue past the opposite edge before releasing the nozzle.
4. Rotate the direction for the next coat: horizontal, then vertical.
5. Let each coat dry for around 15 minutes before assessing whether another light pass is needed.
6. Test the surface only after it has settled: touch an unimportant edge with a clean dry finger or rub a scrap test panel with a dampened brush.
Do not aim for a glossy, saturated surface. You are fixing particulate graphite, not laminating a menu. The drawing should remain matte or close to it, and the ground should not develop visible droplets.
A workable fixative is especially useful when the oil wash will begin very lean: thin paint, restrained medium, plenty of optical openness. These washes reveal everything underneath. A solid, dark opaque block-in can conceal a multitude of sins; a transparent wash is less forgiving and, frankly, less interested in your excuses.
What spray fixative does not solve
Fixative can stabilise the drawing, but it does not automatically create the ideal painting tooth. On a very smooth panel, the first oil wash may still skate around in an annoying, reluctant way. If the intended technique relies on broken brush drag, dry-edged scumbling later, or a more tactile oil layer, a subsequent clear acrylic gesso layer can be useful.
But there is one rule that deserves to be printed above every sink: do not brush acrylic medium or clear gesso directly over heavy, loose graphite. The wet material will mobilise the carbon and pull it across the surface. First fix the drawing with a light spray barrier. Then apply the acrylic layer.
Three barrier routes, and what each one actually buys you
There is no universal best method because the drawing, support, and first paint layer ask different things of the surface. The useful question is not “Which seal is archival forever?” Nobody gets to make that promise honestly across centuries and changing materials. Ask instead: what must this barrier prevent, and what surface must it leave behind?
Route one: spray fixative, then clear acrylic gesso
This is the practical workhorse for artists who want visible drawing control and a toothy surface for the oil wash.
After a light, fully dry fixative layer, apply clear acrylic gesso thinly and evenly. The clear gesso preserves the visibility of the drawing while giving the oil paint more purchase than a slick sealed panel. It is especially sensible for a fantasy art oil sketch where the drawing contains perspective lines, figure rhythms, or a complicated creature silhouette that must remain legible during the first pass.
The drawback is visual: clear gesso can slightly alter the apparent darkness or character of the pencil line, depending on the product, layer thickness, and ground beneath it. Test it on an offcut. Professional practice is not mystical; it is mostly refusing to conduct material experiments on the only panel that matters.
Route two: a thin dammar-and-mineral-spirits seal
A classical panel approach uses a custom mixture of one part dammar varnish to one part odourless mineral spirits. One atelier method applies this in a single thin coat with a soft sponge makeup wedge.
The appeal is control. The liquid barrier can lock down a reduced graphite drawing without adding the more pronounced tooth of clear acrylic gesso. It suits a painter who wants the oil wash to move smoothly across a relatively even panel—useful for controlled gradients, large tonal staging, and precise edge management.
Apply sparingly. Load the sponge wedge lightly, wipe it out, then distribute the mixture in a fast, even pass. No scrubbing. No second-guessing the surface mid-stroke. If the wedge starts dragging visible graphite, stop: the drawing was not sufficiently reduced or fixed, and continuing will only turn the barrier into a grey filter.
Dammar has a long history in painting practice, but historical familiarity is not a blank cheque. Treat the mixture as a tested workshop option for this particular technical purpose, not as a universal archival guarantee.
Route three: amber shellac for a tonal start
Amber-toned shellac has been used in traditional training to fix charcoal or graphite drawings before oil painting. The method has roots in older studio practice and fits naturally with a warm imprimatura or a dark, Baroque-leaning underpainting.
For fantasy illustration, shellac can be useful when the image needs a warm middle ground from the outset: firelight scenes, interior rituals, aged stone, brass machinery, skin against a dusk atmosphere. It can also make a drawing read more decisively through an early monochrome block-in.
The trade-off is obvious: amber changes the colour field. That may be an asset, or it may sabotage a scene designed around icy greys, clean lunar whites, acid-green atmosphere, or clinical science-fiction lighting. A warm barrier under a cold palette is not automatically “rich.” Sometimes it is simply fighting the shot.
The barrier is part of the image pipeline. If it shifts tooth, value, or colour, it is already participating in the painting.
Launching the oil wash without ruining the preparation
Once the drawing is sealed, the temptation is to relax. Resist it. The first oil wash can still wreck the surface if it is treated like a cleaning operation.
Use a clean solvent container for the opening stage. A jar already clouded with yesterday’s black and burnt umber sludge is not neutral solvent; it is pre-mixed mud. Keep the brush clean, load a modest amount of paint, and establish the large value organisation first.
For an effective underpainting preparation checklist, the first wash should answer four compositional questions:
- Where is the dominant dark mass? Not every shadow. The major one that frames the read.
- Where does the eye land first? Preserve the lightest light, sharpest edge, or strongest contrast for the focal point rather than sprinkling it around the panel.
- Which silhouettes carry the narrative hook? A knight, a creature’s head, a spacecraft, a tower breach—identify the forms that still communicate when the image is reduced to thumbnail size.
- What can disappear? Background information that does not support depth, scale, or story should stay subordinate. The painting is not obligated to display every line you spent three hours drawing.
Work broad to narrow. Let the wash establish value families rather than tracing contours. If a sealed line remains visible, use it as a guide. If it begins to interfere with a better painted edge, paint over it. This is the entire point of the barrier: it gives you options.
For wet-into-wet oil technique, a sealed pencil underdrawing is particularly helpful because it prevents the initial brush movement from blending graphite into the paint film. But the wash itself still needs discipline. Overworking wet passages is how a clean underpainting becomes beige administrative fog.
The alternative that removes half the problem: coloured pencil
Standard wax-based coloured pencils are a credible alternative for an underdrawing beneath oil washes. Unlike graphite, they generally do not smear or contaminate oil paint in the same way, which is why many illustrators use a light coloured line—often a muted red, brown, blue, or ochre—to map a composition.
This can be a smart choice when the underdrawing needs to remain visible but should not cool the paint film. A warm red-brown line under a flesh-and-bronze scene is easier to absorb than graphite. A pale blue line can work under a cold science-fiction environment. The choice becomes part of the colour scripting rather than an accidental grey contaminant.
Still, restraint applies. “Coloured pencil is safer than graphite” does not mean “build a wax mural and pour oil over it.” Different pencil formulations vary, and the long-term behaviour of every specific modern product under oil paint is not established. Keep the marks light. Use them for placement and directional energy, not dense value rendering.
Charcoal is another traditional possibility, but it demands its own fixing strategy because it is even more prone to movement than graphite. If the desired drawing is expressive, loose, and charcoal-driven, commit to fixing it properly before introducing oil. Do not rely on the first paint layer to pin it down. It will not. It will merely spread it around with confidence.
A final studio pass before paint goes down
Before mixing the first wash, inspect the panel under angled light. This catches the things front-on viewing politely hides: glossy fixative puddles, fingerprints, graphite dust near the edge, scored grooves, and uneven barrier coverage.
Run through this short final sequence:
- The drawing has been reduced with a kneaded eraser; only structural information remains.
- The chosen barrier matches the surface and intended paint handling.
- Spray fixative, if used, was applied in light alternating passes from a proper distance and allowed to dry between coats.
- Clear acrylic gesso was applied only after graphite was fixed, never directly onto loose drawing material.
- The panel still has the right tooth for the first oil layer.
- Solvent, brushes, rags, and palette are clean enough that the wash begins clean.
- The drawing’s focal information is visible, but it does not force every contour decision.
- A small test area has confirmed that the first wash moves as expected.
That is the real checklist. Not a pile of products. A sequence of decisions that keeps the underdrawing from becoming the painting’s weakest layer.
A good oil wash over pencil drawing preparation should disappear from the viewer’s awareness. The final dragon, spacecraft, ruined chapel, or card-game duellist should look like it emerged from coherent value design—not like it was built on a pencil drawing desperately trying to escape through the paint.